Friday, March 14, 2014
Yeah sure, I love calling a tent home, having my nails be painted only with dirt, and I’m okay admitting that I am still carrying around the tube of foundation that was already half-empty when I left home a year ago…but sometimes, just sometimes, I really really miss reading Martha Stewart magazines, perfume or planting far too many seeds in the vegetable garden.
The truth is, this travel thing has completely squashed the crafty female in me.
Well, I had some big plans in Jaipur to fix that.
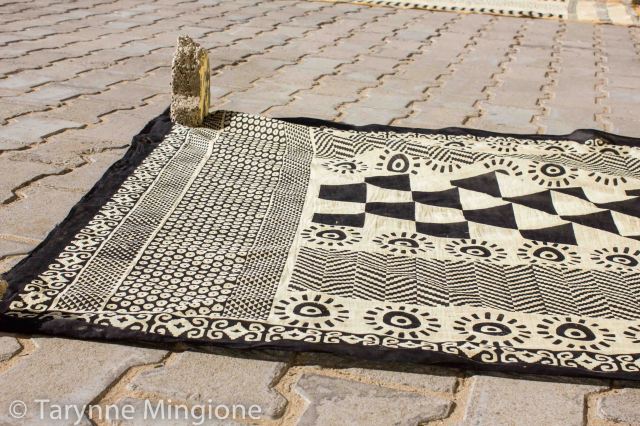
I signed up for a block-printing workshop in Bagru. Bagru is a city 30 km outside of Jaipur, and is known for its use of vegetable dyes and block printing.
I imagined I would be whisked away in the morning, spend a day drinking tea and taking ridiculous amounts of time creating chaotically organized patterns and getting happily lost in ink and fabrics, only to return home to James refreshed and ready to roll for the next few months.
The first portion of the morning was spent learning about natural vegetable dyes. These dyes have been used for centuries, with some of India’s most sacred and oldest texts referring to these dyes.
Since the 19th century and the introduction of synthetic dyes, the use of natural vegetable dyes is steadily declining. I’d compare this to organic and conventional foods – of course the natural vegetable dyes are more expensive and more difficult to use than their chemical counterparts. Everyone likes easier and cheaper, so go figure that natural dyes are on their way out.
Bagru is one of the areas in Rajasthan that continues to use natural dyes.
I had signed up for a one-day Block Printing Workshop, which meant I would learn about all of the steps and processes involved to make final block printed pieces.
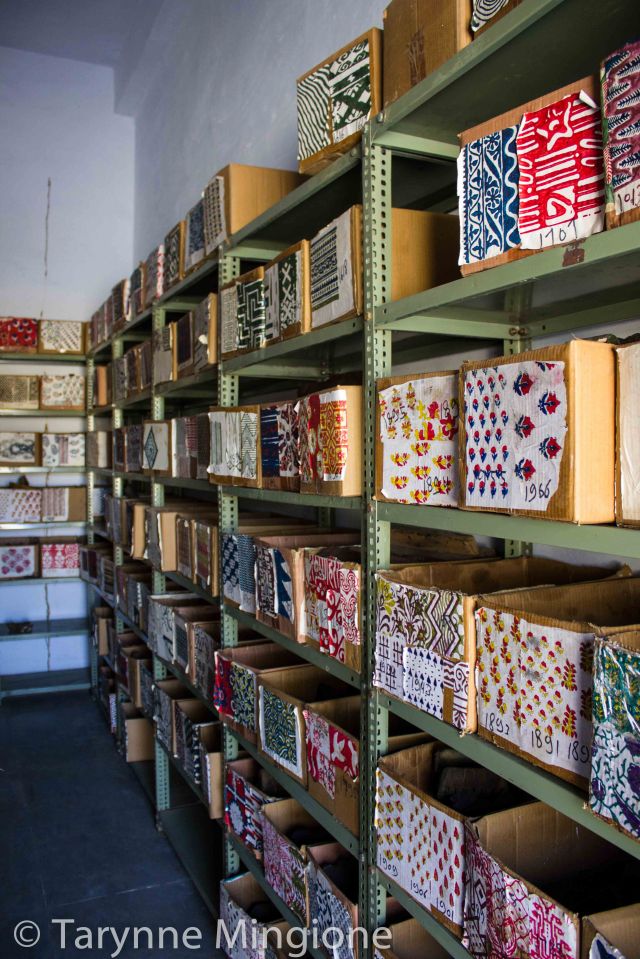
The Steps of Block Printing
1. WASHING
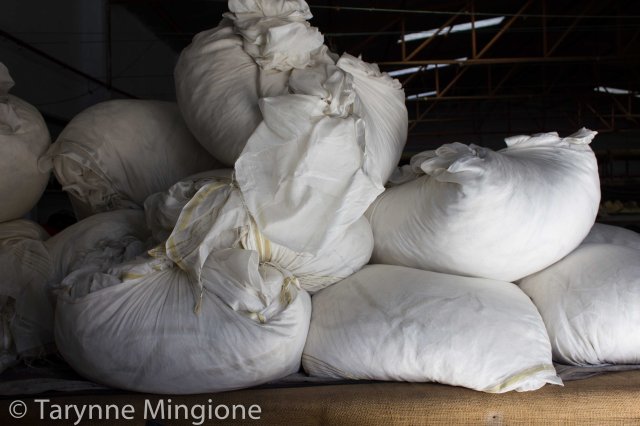
Gujrat and Maharashtra are two states in India that produce lots of cotton and have an abundance of weaving mills. Punjab and Hariyana also produce cotton, but there is an absence of mills there. I also learned that rice starch is used in the weaving process to strengthen fibers. Gluten-free cotton, now that’s my style! Kidding – if I see this on the market one day I am going to lose my mind.
The artisan I was learning from revealed that cottons used to be washed in cow dung mixed in cold water and were left to soak in that yummy mixture for 48 hours to remove impurities naturally present in cotton. After two days, the fabrics were removed and washed on stones. The final product was clean white, linen-fresh cottons ready for the next step!
Although there is an abundance of cow dung scattered in the streets and I wanted to suggest they put it to good use, I remained silent as I was told about the present day washing process.
Ten liters of cold water, 100 mg caustic soda and one liter of acid slurry are combined to make liquid soap that is used to wash freshly woven cottons. That much soap will wash 1000 meters of fabrics. After soaking 10-12 hours in this soap mixture, the fabrics are removed and ready for the priming steps of block printing!!!
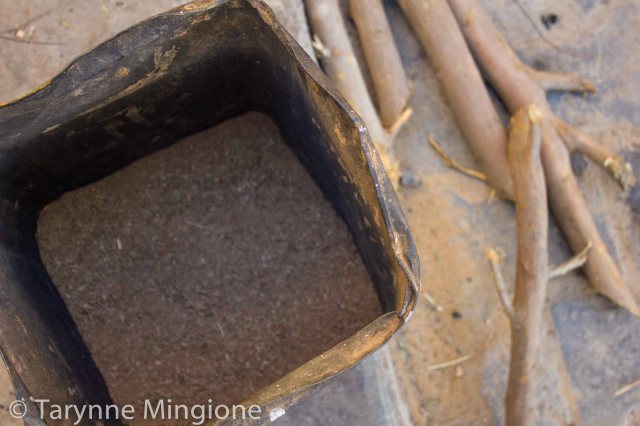
2. HARDA DYING
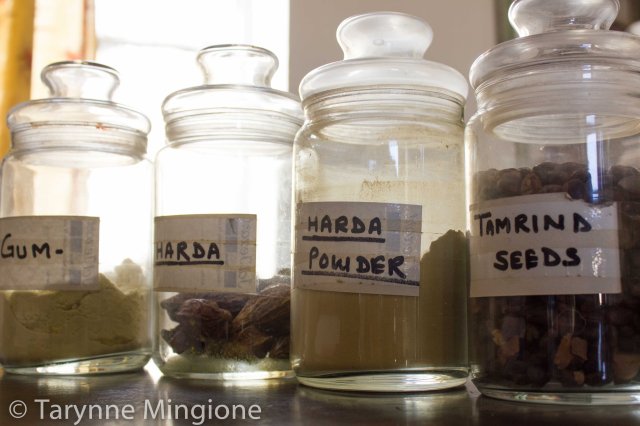
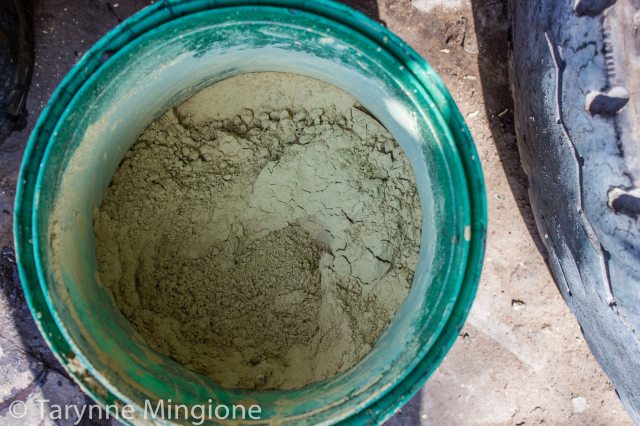
Harda is black myrobalan seed powder, prepared from the harda fruit. This harda powder is a natural mordant, which means it is used to fix a dye to fibers. It also improves the take up quality of the fiber and helps improve color and light fastness.
I am not exactly familiar with the harda fruit, but I could see the powder was a yellow color and I was told it would be used for dying cotton fiber base fabrics, such as the one I would be using.
News to me, my old home Goa is a major producing center for this little fruit. I know you don’t care, but I was curious how much all of these “ingredients” cost. For just 30 rupees you could get one kilogram of dried harda powder, which would dye 50 meters of fabric.
I went outside and watched as my two pieces of clean white cotton were soaked in the harda for 2 minutes before being twisted dry.
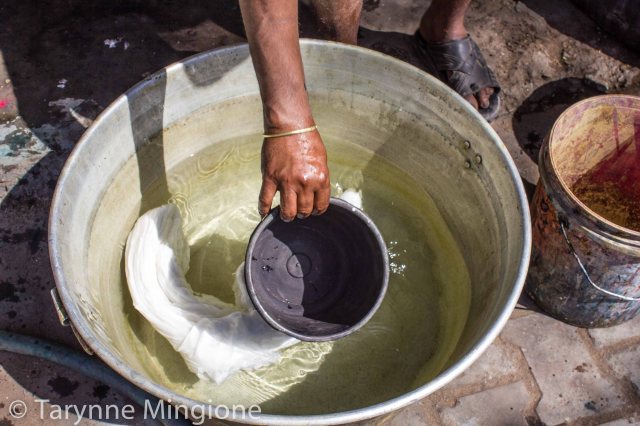
3. DRYING
The now yellow tinted cotton pieces were laid on the dirt ground and left to dry in the sunshine for nearly an hour.
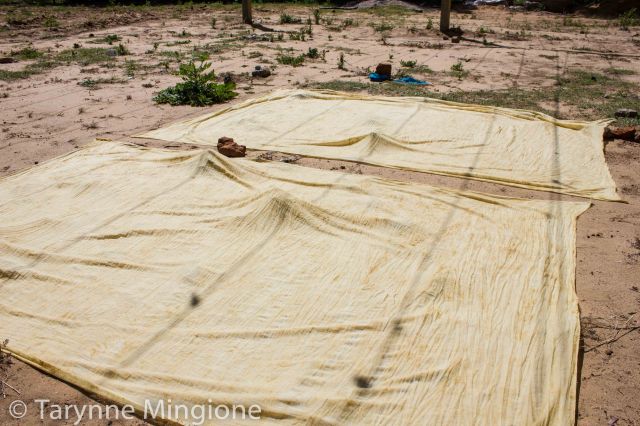
I was told that after harda dipping, the items must be laid on a flat surface rather than hung to dry because the harda will shift downward with gravity, resulting in poor mordant functions and having dye stick variably to the piece.
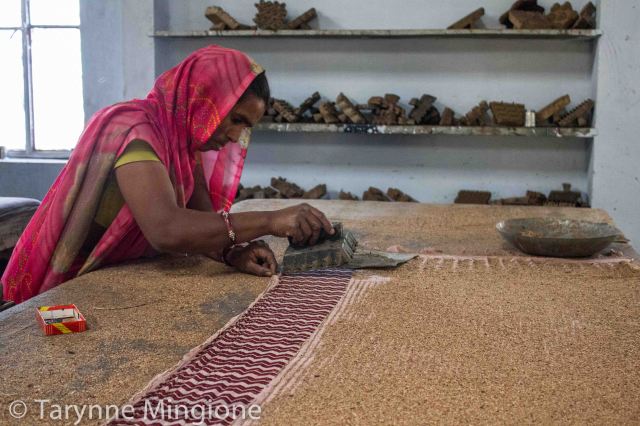
4. PRINTING
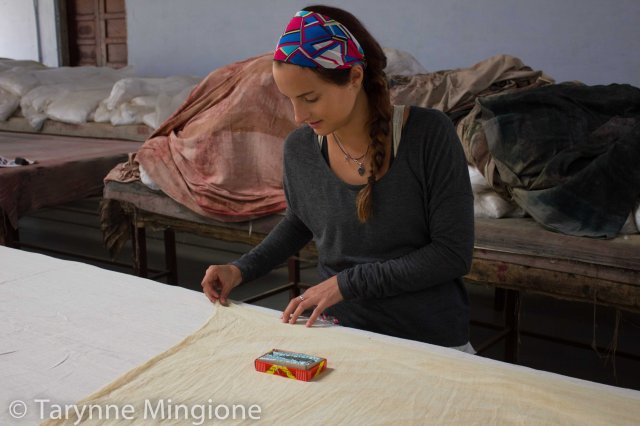
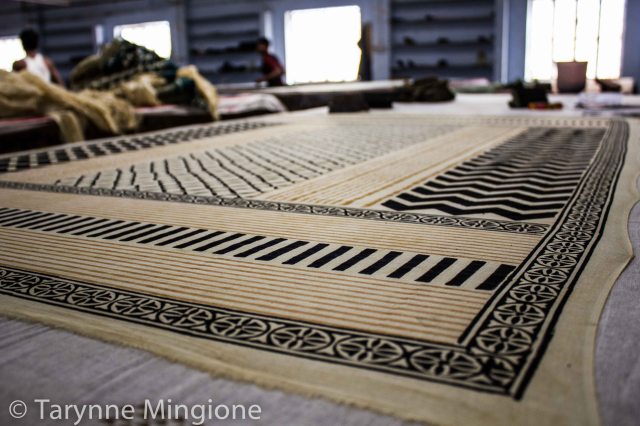
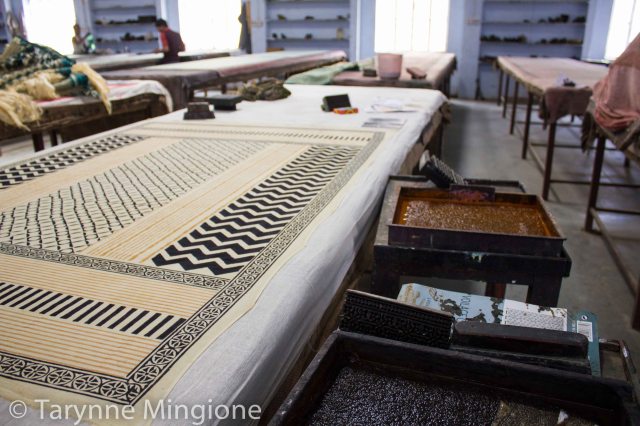
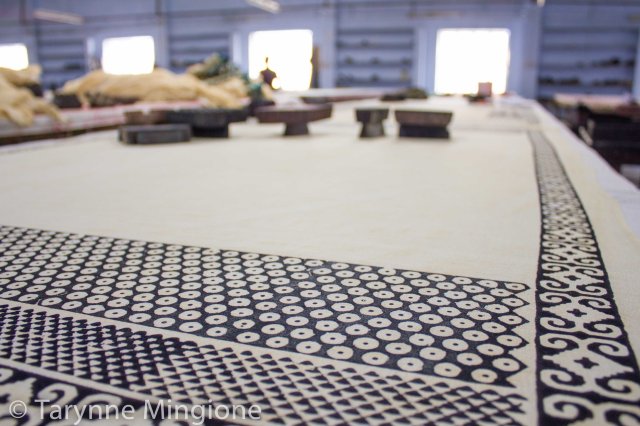
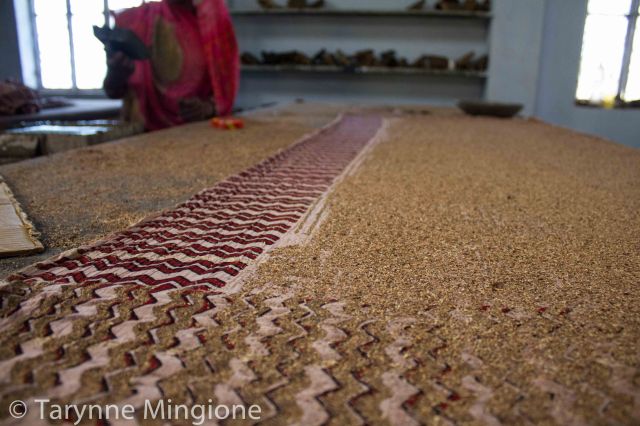
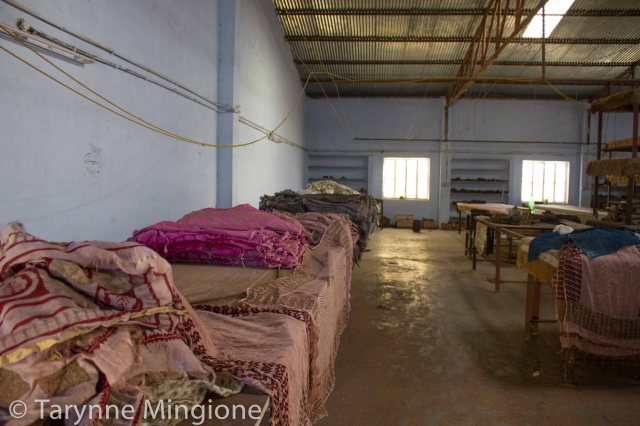
The evenly dried pieces come inside to the printing room. Traditionally printing tables were 2×3 feet and just 1 foot above the ground, but presently these tables look like a sweet family style Pottery Barn dining room table dream come true. The tables are covered with 22-26 layers of hessian cloths and then covered with three to four layers of old fabric (acharas), which are changed with every new piece that is being printed.
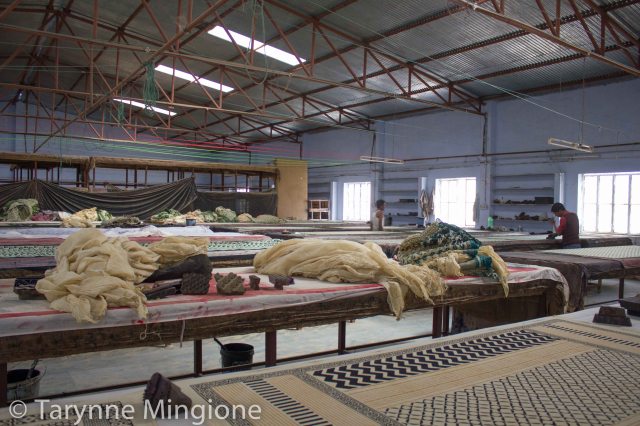

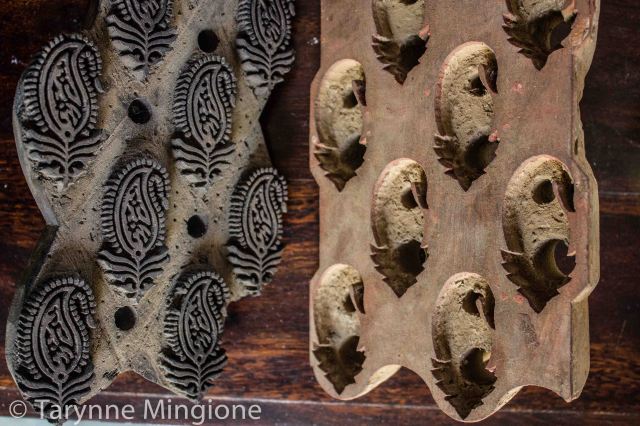
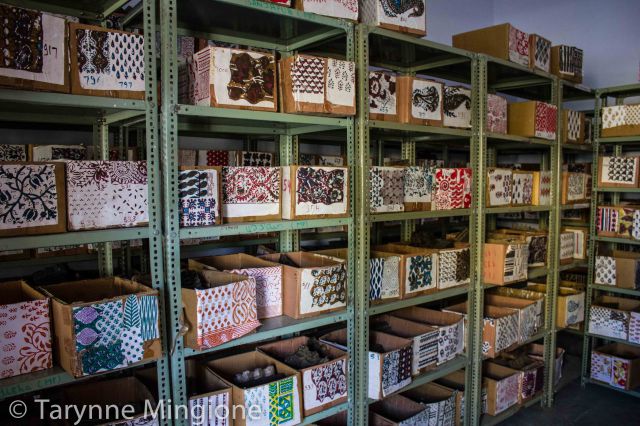
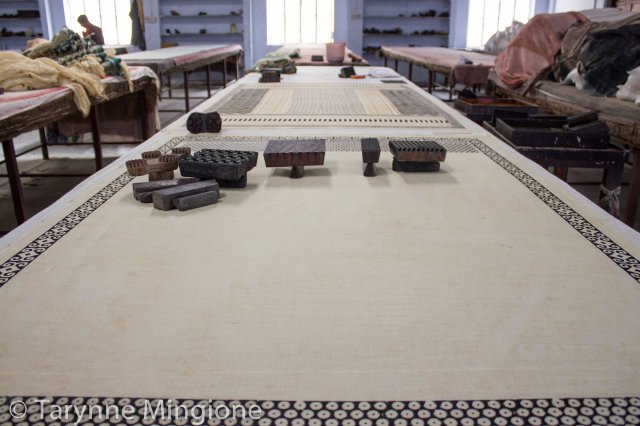
Wooden blocks are created using tiny tools and are all sketched and chiseled out by hand. These blocks are what are dipped into thick dyes and then create beautiful designs on the cotton pieces.
Small pins and an extra set of hands helped me pin my pieces onto the tables.
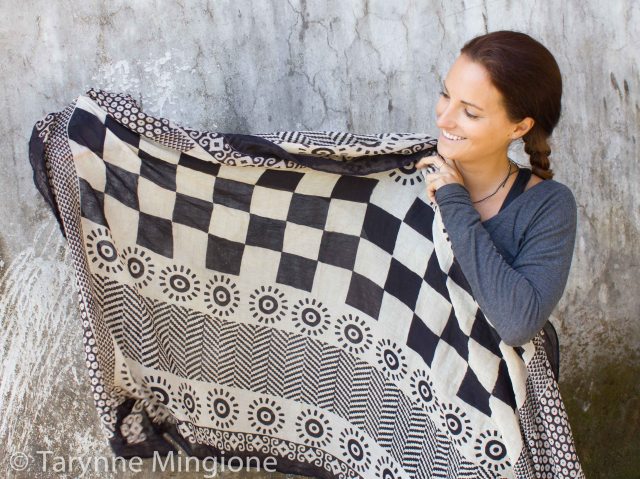
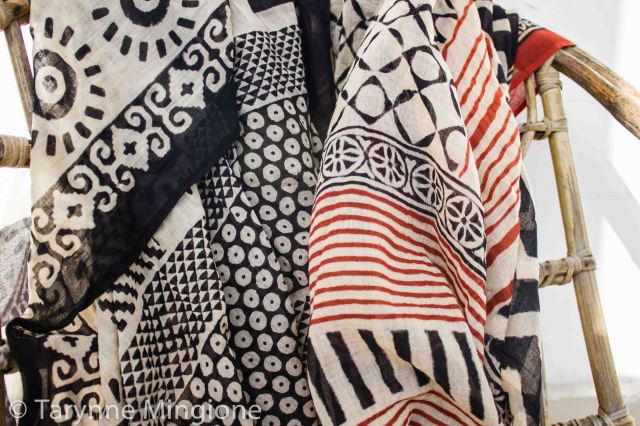
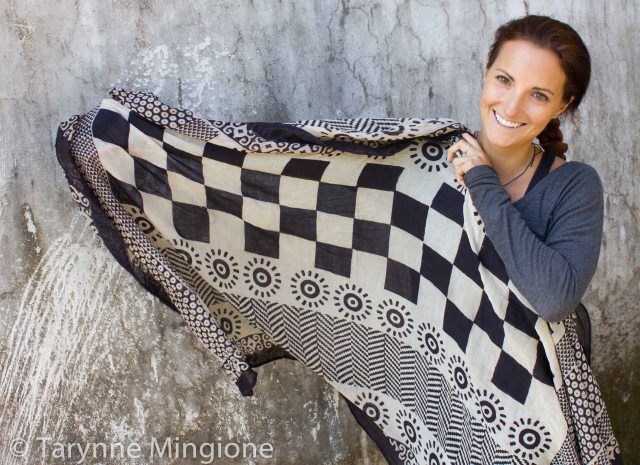
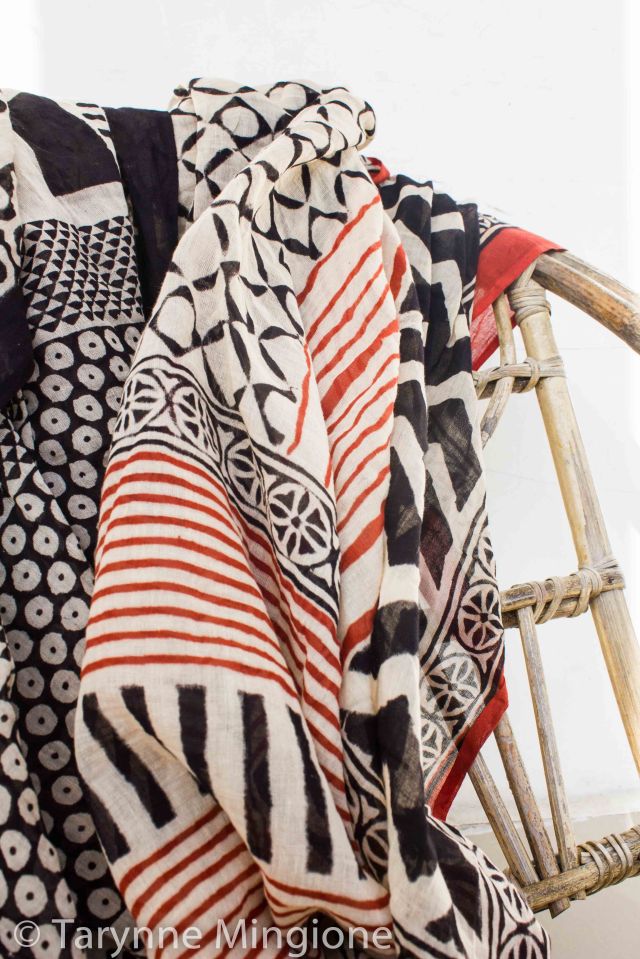
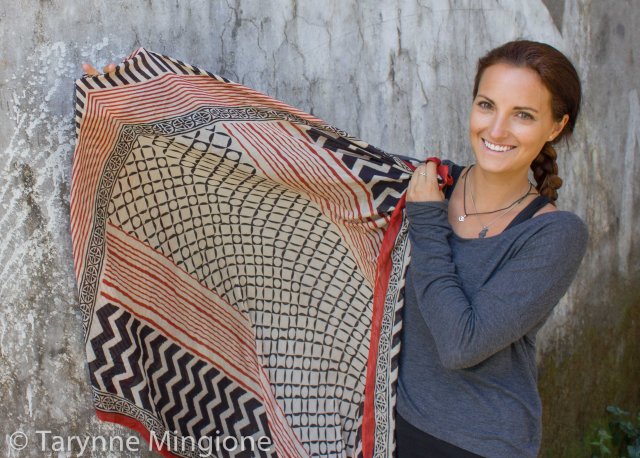
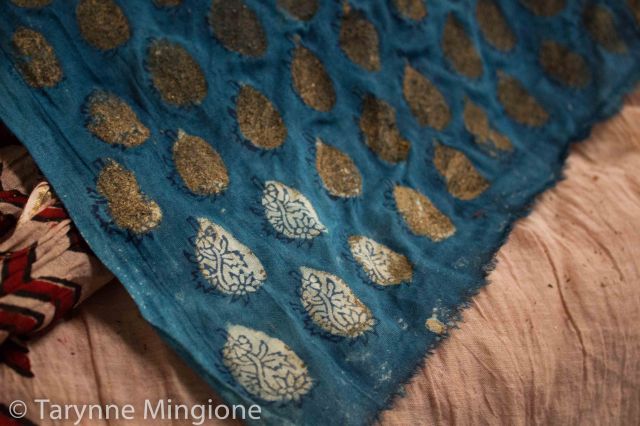
I selected my colors; my options were black, red, brown or multicolor (black and red mix). So I selected black and red for one piece and just black (and white) for the other. I’ve seen too much brown in India, I definitely don’t want it on my about-to-be-new scarves.
The Natural Dyes Come to Life As Follows:
Black:
The black dye is made from black horseshoe nails. The owner of the horse collects the horse clips, washes them and dry brushes them to remove dirt. The clips are burned over a fire for 5-10 hours.
About 30 kilograms of horseshoes (50 rupees for 1 kg) are added to 50 liters of water and 2 kilos of jaggery (juice of sugar cane).
Due to my obsession with kombucha culturing, I could easily understand the chefs notes here. Depending on the time of year, this recipe varies slightly. In the summer only 1 1/2 kilos of jaggery is used since temperatures are much higher so fermentation happens more quickly, about 10-15 days. In the winter, 2 kilograms of jaggery is used and fermentation takes about 20-25 days.
The fixing agent for black dye is tamarind seed powder. Tamarind is a sweet, soft, tasty flower that is oftentimes used for preparing curry sauce and gravy in Indian cuisine. It grows in lush climates, so not the desert areas like Rajasthan. Even though, the powder can be purchased from the local markets at an impressively cheap 30 rupees per kilogram. The flower is the main source of tartaric acid, and the seeds are black due to the hardy black capsule encasing the cream colored interior. The cream seed is then ground to create a powder.
To prepare the fixing agent, 1 kilogram of tamarind seed powder is added to 3 liters of fermented water (water plus jaggery) and then boiled for an hour.
The black dye is then ready for use!
Red:
The red dye is created from alum (aluminum sulfate).
While that’s not entirely interesting, the fixing agent is. The fixing agent uses natural guar gum, which I recall seeing fields and fields of in the Thar Desert. The seeds of the plant are ground into natural gum.
To prepare the fixing agent, 1 kilogram of gum powder is added to 20 liters of fresh water to create a gooey ghostbuster looking paste. For this mixture, 200-800mg of alum is added, more or less depending on the desired shade. If a lighter shade of red is wanted, then less alum is used, alternatively if a deep rich red is wanted them more alum is added.
Brown:
While I wasn’t interested in applying this color to my pieces, I was still interested to learn how it was prepared.
Brown color comes from red kasis, which is a crystal like substance that comes from mines and is dissolved in cold water. To prepare, one liter of water is added to 5 mg of red kassis.
The fixing agent for brown is the same as black. One kilogram of tamarind seed powder is added to 3 liters of fresh water and mixed, then boiled and cooled and ready for printing.
Mixture:
A fourth dye that is used in vegetable printing is a combination of red and black. One liter of black is added to 2 liters of red, and this ratio can increase depending on the desired shade.
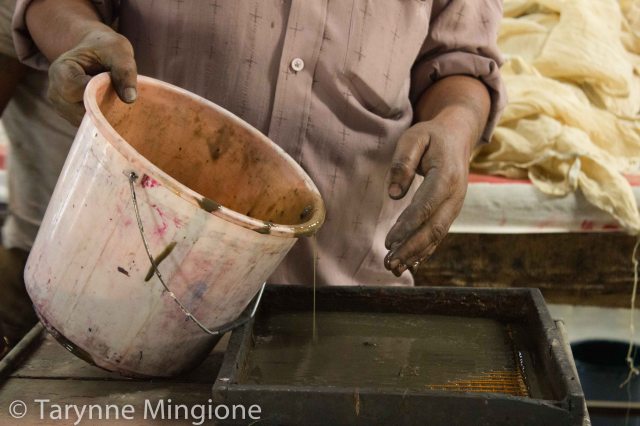
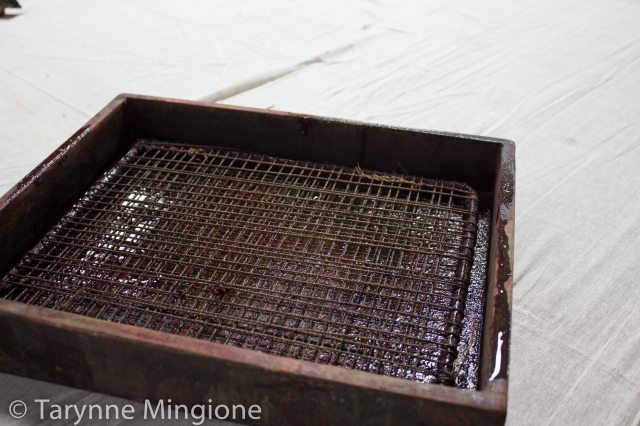
An artisan helped me fill a color tray. The color tray is a wooden box, inside is a metal frame with strings winding like an abrca-cadabra playset weaving back and forth. Ink is poured into the tray and the wheely tray would stay glued to my right hip as I printed left to right in a regimented way.
So now that my color trays were filled, I was set free to begin printing!
I was beyond excited to get my hands dyed and let the creative juices unclog.
Unfortunately, the artisan I was under the supervision of decided he would be a bossy dominating “doer” rather than “teacher.” He tried to select blocks, colors and designs for me.
Sucks for him because I was just not having it. Little miss independent is not sporting your stupid floral, cheesy horse or overwhelming acorn stamped pieces.
Not today, not ever.
Lucky for me he was also the most inattentive “teacher” I have ever encountered so while he was eating a snack, taking a nap, joining a conference call and taking catalogue review breaks that lasted hours as a time, I went completely unnoticed in the quiet printing room.
One young flamboyant man that spoke not a word or charade of English quickly picked up on the fact that I passionately disliked the imposing bossy, hurried attitude of his boss who was taking over my pieces, so every time the artisan left the room he would quickly help me rummage through the blocks in search of the perfect stamp.
We got in trouble several times, as the artisan left the room thinking he would re-enter 30 minutes later and I would have a scarf printed with poo brown bucktooth unicorns and pine needles ready for drying and washing. Instead he came back in and saw I was using blocks that were ones he did not select and advised not to because they were too small and took up too much time.
Sorry, home boy, but if it weren’t for you taking 3 hour breaks during a 7 hour workshop, I’m pretty sure we would have more than enough time to do like a 2 year old and play with blocks all day.
In the end, I sneakily created the two pieces that I wanted with very few permanent reminders of the overbearing, controlling artisan that I was supposed to mime.
I finished my pieces while he was once again out of the room and I sealed the final stamp with a high-five to my Indian buddy that helped me disobey his boss.
5. DRYING
My pieces were left to dry in the sunlight while I waited on the curb. Having forgot breakfast and lunch I sat in the sun talking to my cab driver who was bored out of his mind.
Meanwhile, I got to see another form of printing, Dabu mud printing which uses mud in the process.
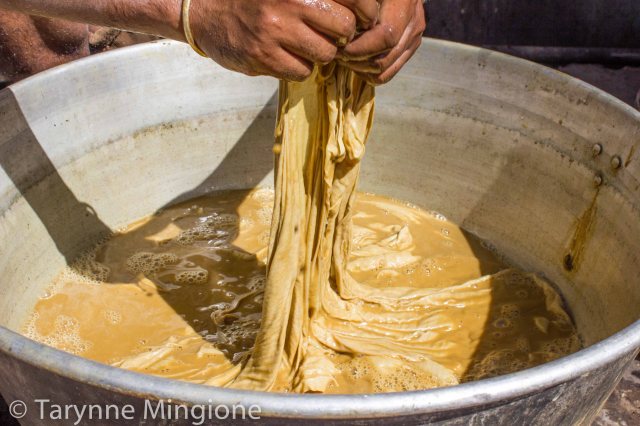
6. WASHING
The pieces were washed in cool water to remove excess color.
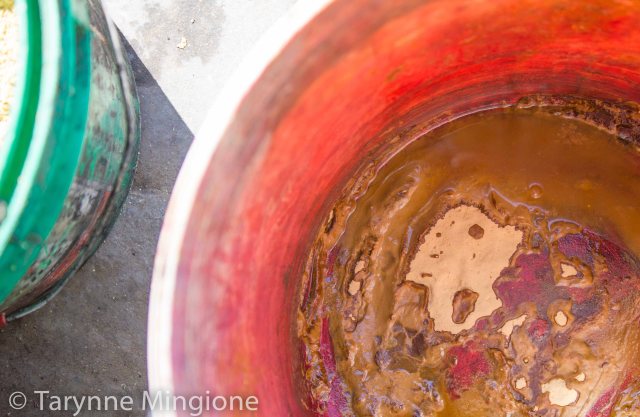
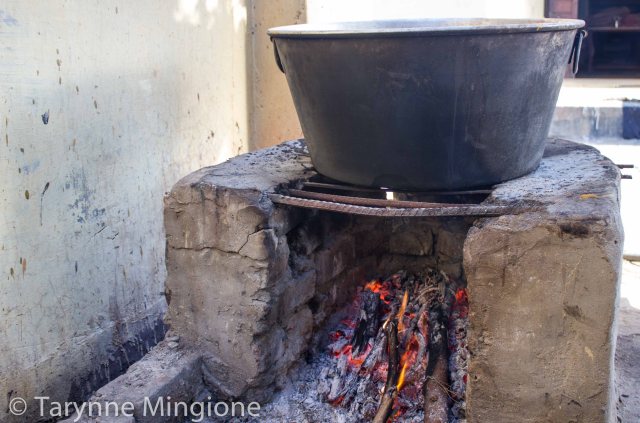
7. BOILING
The two pieces were then boiled in this last and final process. Copper pots were used (otherwise the harda powder in the fabrics react with the iron). Dahura flowers were added to bring out the whiteness of the white cottons and alizarin (from ground up roots of Indian Madder tree) was used to enhance reds.
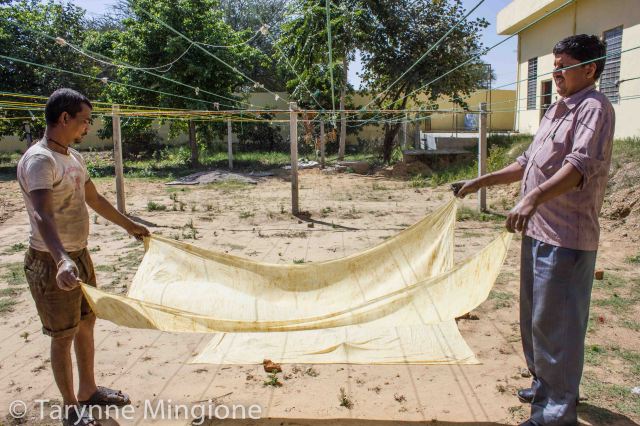
I waited impatiently for my pieces to boil so I could see the final products.
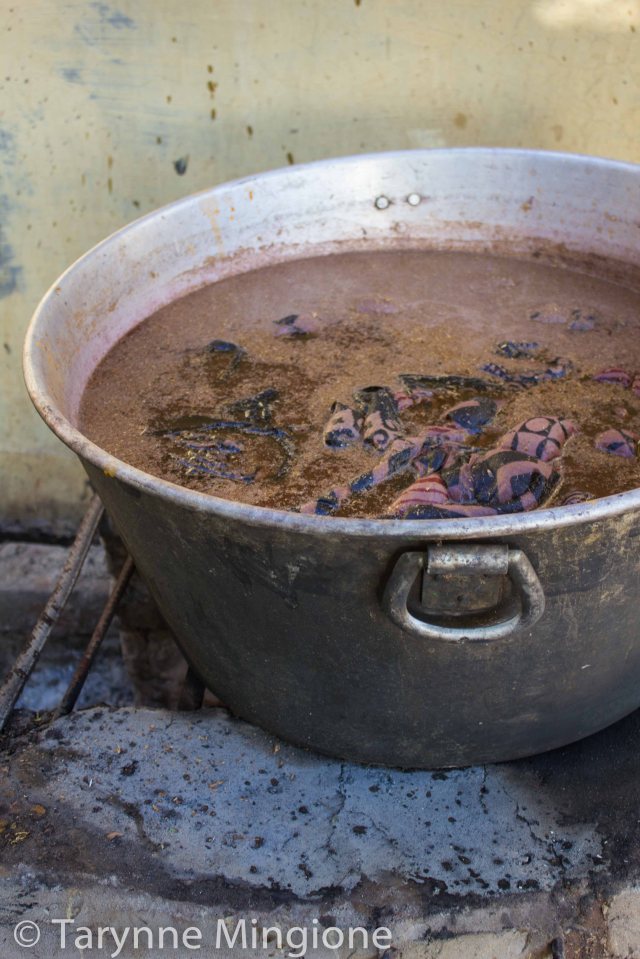
In what felt like forever my pieces were removed and twisted dry.
I was super happy with my pieces and definitely will be picking up some wooden blocks to do this at home!!!