Today I installed the new 4.1-gallon Clarke gas tank on my XT225. And, overall, I have to say it was far less complicated than the sprocket swap out, which is to say, it was very easy, absolutely basic, un-screw screw-in stuff.
First off, while the directions that come with the Clarke tank are okay, they're not great, and they are a far cry from detailed. I mean, the first step is "remove the existing gas tank", with no clues as to what that entails. The description that follows is far more detailed for those who don't yet know their ass from their elbow when it comes to motorcycles [like me...].

Alrighty then, here we go, step-by-step:
1. Remove gas tank. What this means is:
a) Drain gas out of the tank by disengaging the clamp on the fuel hose which runs from the petcock, and draining gas into a container. It doesn't get all the gas out, but it doesn't require a siphon, which is a perk. When gas isn't flowing out anymore, shut off the valve for a few minutes, let the residual fuel accumulate, then open the valve to "reserve" and drain some more. Repeat until it seems unnecessary.
b) Take off the side panels, the front-side panels (remove completely since these won't fit the new tank at all), and unscrew the tank mounting plate where it meets the seat. That's it.
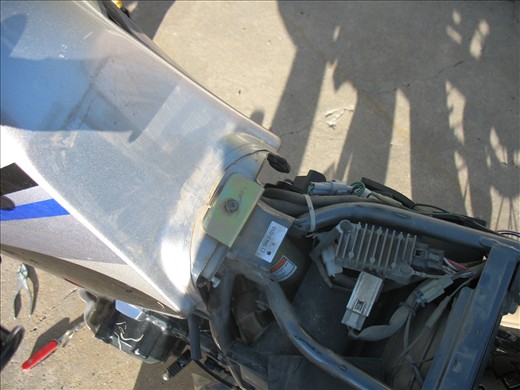
2. Remove petcock from old tank and place on new tank. If you're fuzzy on the difference between o-rings and gaskets and whatnot, the only thing you need to know here is that the new tank comes with the petcock parts it needs already attached to it--don't look among all the other parts that come with the package.
3. Move horn to new location. Very simple and straightforward, but the photos that come with the Clarke instructions are too zoomed-in for my liking, so here's some more:
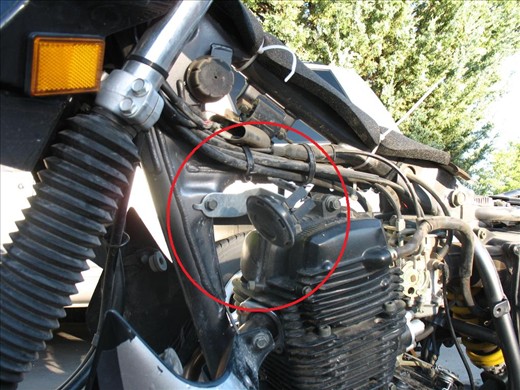
(Original horn placement)
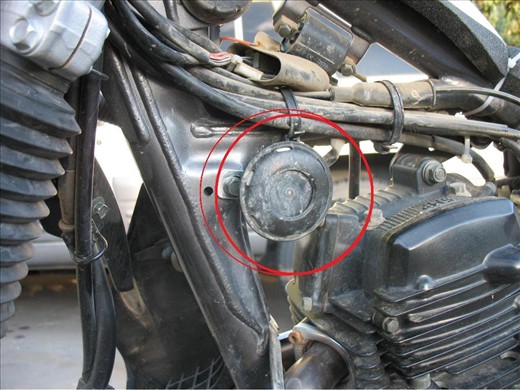
(New horn placement)
4. Add new mounting brackets for side panels. Again, straightforward, and again, finding the new bracket locations with Clarke's photos was like "Where's Waldo", so here are some better ones:
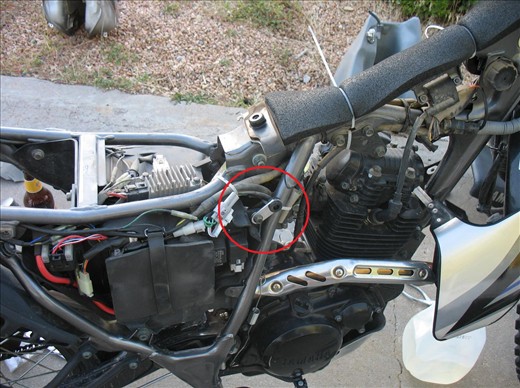
(New right panel bracket)
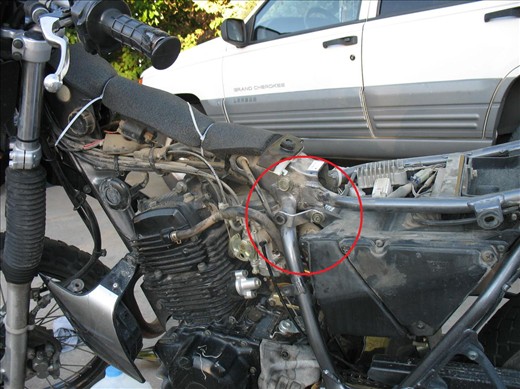
(New left panel bracket)
5. Mount new tank (after rinsing and air-drying) with new hardware. The "pucks" slide into their slots really easily. You just need to wiggle the new tank up onto the pucks far enough for the new mounting hardware and old mounting hardware to match up so you can screw them together.
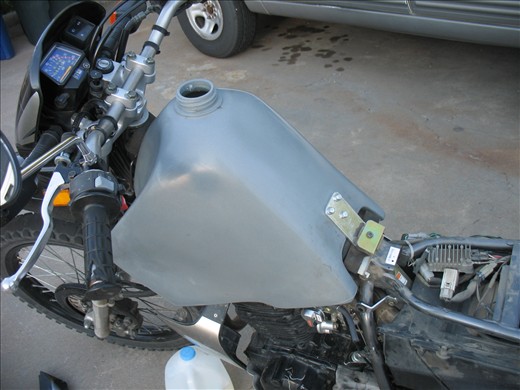
6. Check for leaks, reattach seat, reattach panels, and ooh-and-ah at the sexiness of your new tank.

(Ooh, ahh....)
Other notes:
a) The old metal tank easily weighed 6-8 lbs, which means the new light-weight plastic tank plus gas won't weigh much more than the old set up. At most, the new tank full of gas will weigh 8-10 pounds more than the old one full of gas.
b) The Clarke tank says on it, "FOR OFF ROAD USE ONLY". I don't know if that's important or not, but I'm choosing to ignore it...
c) The "silver" Clarke tank matches the 2005 bike just fine. Also, because the tank isn't as solid or as dark as the last one, I can look inside through the gas cap hole and easily see exactly how much gas I have in the tank.
d) People have expressed concern over how much gas can remain in the new tank after using up the reserve because of the design of the tank. However, considering how much gas came out of the original tank when set to "reserve", and how much still remained in the tank after removing it from the bike, I don't really see how the new tank is that much different. It seems to me that the old tank had the same problem, and that the sloshing that occurs during riding will send some of the residual over to the petcock with either tank. Granted, there's no precise volume measurements involved in this opinion, just an observation.
At any rate, I'm thrilled, and can't wait to check out my new mileage per tank!